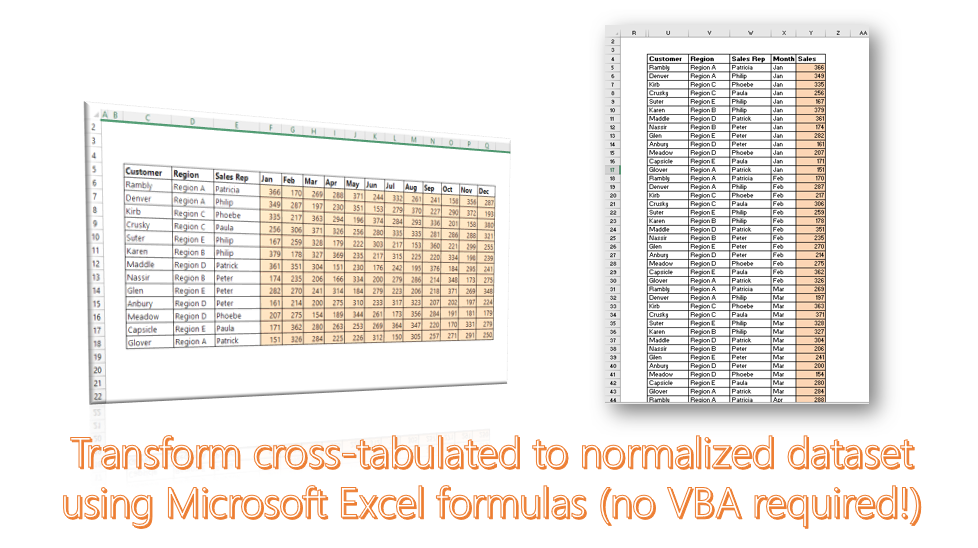
Here is how to set up your Excel worksheet with the flexibility to update the time unit as required.
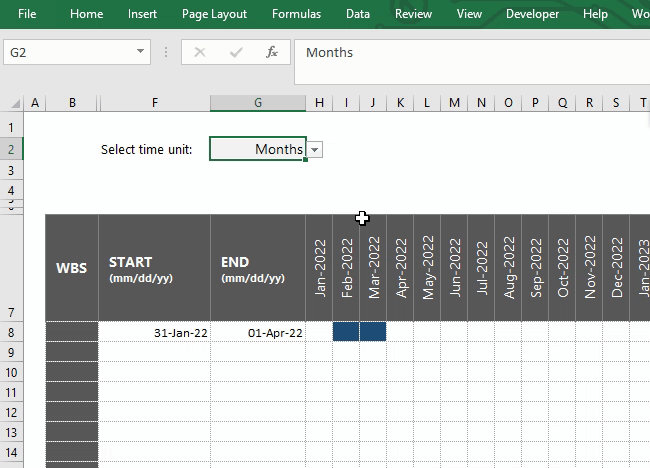
In the example below, the flexible timescale has been created for a Project Gantt Chart, and users want to retain the ability to view the project task timelines in days, weeks, or months. This has been made possible with the help of a complex but easy-to-understand formula logic.

The formula powering this flexibility is a complex IFS formula shown below:
=IFS($G$2=”Days”,’gantt chart’!H7+1,$G$2=”Weeks”,’gantt chart’!H7+7,$G$2=”Months”,’gantt chart’!H7+31)

The logic for the formula – which runs on the IFS function, a combination of multiple IF statements – is as follows:
IF the selected time unit is “Days” then increase the start date (H7) by +1
IF the selected time unit is “Weeks” then increase the start date (H7) by +7
IF the selected time unit is “Months” then increase the start date (H7) by +31
This formula is extended into the other cells in the date range of this Gantt Chart, keeping the start date reference (H7) relative so that it increments by one column with each new date. The reference to the time unit cell ($G$2) is kept as an absolute reference so that all formulas maintain the reference to that unit.

Something else you might have noticed is the change in date number format when the time unit selected is Months. When either ‘Days’ or ‘Weeks’ is selected, the dates show up as dd-mmm-yy (e.g. 02-Jan-22), whereas when ‘Months’ is selected, the date format is mmm-yyyy (e.g. Mar-2022).

This has been done using conditional formatting rules. The set up for the Months formatting rule is below: