Sometimes on projects, there might be a need to deploy internal mini-surveys to client staff. Depending on the level of sensitive information in such surveys, Google Forms may not be an ideal platform to deploy the questionnaires, and project costs may not allow for SharePoint-based surveys. MS Excel can come in handy for this need.
One of the main challenges associated with creating forms or surveys in MS Excel is setting up several check boxes for close-ended questions so user input can be collated in the most efficient manner possible. Typically, form controls (available in Developer>Insert on the Excel ribbon) return Boolean responses. However, for a survey containing up to 20 or 50 questions – most requiring checkbox options – placing and programming these check boxes on the Excel sheet can be a time-consuming task. This blog post is about automating this task and reducing it to a three-minute endeavor.

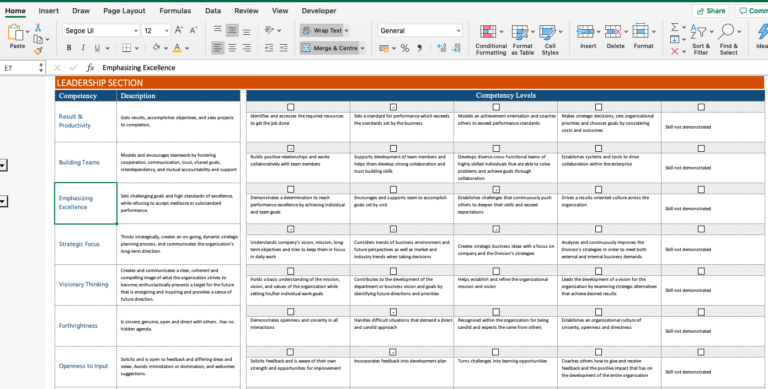
If you have 50 survey questions in column B of your worksheet, and you want to place check boxes against each question, follow the steps below:
Step 1: Place a checkbox form control in column C, in front the first question, and clear off the pre-set name using the “Edit Text” option. Align the checkbox in the column as desired.
Step 2: Select the cell containing the first checkbox and drag down to desired location. As you do this, the checkbox will be replicated across the rows.
Step 3: Link each checkbox to the cell it is in by selecting “Format Control” in the right-click menu and updating the Cell Link Range. Doing this for each checkbox is repetitive and time consuming, so adapt the following VBA code to automate this step:
Sub CBSetup()
Dim i as integerFor i = 1 To 50
ActiveSheet.Shapes.Range(Array(“Check Box ” & i)).Select
With Selection
.Value = xlOff
.LinkedCell = “$C$” & i
.Display3DShading = False
End With
Next iEnd Sub
*The code above assumes the name of the first checkbox placed on the sheet (in Step 1) is “Checkbox 1”
Now this form is set up so that column C returns FALSE if the user does not select the checkbox and TRUE if the user selects it. The TRUE/FALSE responses in column C can be hidden from view by using the “Hidden” cell format (Ctrl+1 to bring up cell format dialog, select “Custom” under Numbers, and type “;;;”) and converted to Yes/No using a simple =IF() argument.